


While a quick trip to do some shooting in the city might involve little more than throwing a body or two in a duffel bag and heading out — an odd overlap with your average serial killer’s check list — heading off somewhere exotic can require a bit more planning. What else should you throw in the bag?
The Short and Skinny of It
Whether you’re off to Africa for a month or headed to a national park for the weekend, the gear you pack can have a significant impact on the type of images you can make and the stories you can tell. After a few years of more missed shots and underwhelming images than I’d like to admit while traveling, we’ve started to hone in on a collection of camera gear that works well for us in the field. Let’s take a quick look at what makes it into the camera bag on nearly any big trip these days, then discuss in a little more detail why it’s that stuff, specifically, that makes the cut:
- Three lenses: a super telephoto (500+ mm), a super wide-angle zoom (14-24mm), and a standard zoom (24-70mm)
- Two camera bodies
- Batteries: one for each body, plus 2-3 extra and at least two chargers
- Small laptop with Lightroom (or similar) installed
- Two external hard drives
- Tripod
- Camera backpack
- Accessories: memory cards, lens/sensor cleaner, polarizer, lots of cables, travel adapter
- Insurance (technically not in the bag, but definitely want some of that)
Seems straightforward enough, but it took us a few years to arrive at this configuration. There are devils in those details!
Getting Up Close and Personal

Galapagos Sea Lion. Isla Fernandina, Galapagos.
Camera bodies just record things. Lenses, on the other hand, determine what we can see. The lenses we travel with shape the experiences we will have and the stories we’ll be able to tell.
Me, I am not a city person. If I’m spending the time and energy to travel somewhere, it’s almost always in search of the natural world and its inhabitants. The first lens I usually think about, then, is something to help us appreciate the wildlife. My inclination is nearly always to grab the longest lens we can manage. I’ve yet to run into too long. That said, too big can start to have some unintended side effects. Seven pounds is about the max I’m willing to handhold (and that’s not fun over the course of a day). Any bigger than that and I know I’m going to be going literally everywhere with a tripod.
Nikon’s Phase Fresnel (PF) and Canon’s Diffractive Optics (DO) lenses can be excellent options for the travel photographer wanting to lengthen their reach without adding on pounds. You can check out a recent review of Nikon’s 500mm f/5.6 PF. That lens, or something similar, will probably be on every trip with us for the foreseeable future. The combination of image quality and size is essentially unbeatable. And don’t forget that renting is always an option if you don’t want to be saddled with a pricey telephoto longer term.
Story Telling
Next, we need a good story-telling lens or two. On one of our first big trips, we took only a single camera body. Since we wanted to get lots of bird pictures, that body almost always had a 300mm lens on it. Anytime we took the telephoto off, a new bird would fly past, so we’d race to put the telephoto back on. When we got home, we realized that only 20% of the images we’d taken were on anything shorter than 300mm. Yet, when it came time to decide what to put in the portfolio or show our friends, 80% of those shots were taken with a 24-70mm equivalent. The take-home message was that it was challenging to tell a good story about the amazing places we’d visited when limited to roughly the field-of-view of a very long toilet paper tube.

Don’t you just love Colorado this time of the year? The wide-open spaces, the blue sky that stretches from horizon to horizon, the bees buzzing about in the flowers at your feet…
After that trip, we became far more determined not to let a good storytelling lens or two be an afterthought. We now travel with both a 15-30mm and a 24-70mm (and both of much better quality than that early lens). It turns out the super wide-angle is particularly good when you wake in the middle of the night to the sound of hippos munching in the grass a few meters from your tent platform, then notice that there are about two billion stars draped overhead. Definitely worth a shot. And the 24-70mm is just about perfect to keep by your camp chair — next to a nice glass of wine, of course — while the sun sets and roos wander out of the forest; you know, just in case something worth snapping a photo of appears. It’s not bad for street shooting either, if you’re so inclined.

Sunset in Grampians National Park, Victoria, Australia, as viewed with a 24-70mm and definitely not with a 300mm or 500mm.
Lastly, we typically throw a 70-200mm into our bag of kit as well. It probably sees the least use for the type of shooting we do, but at f/2.8, it can create buttery portraits of the people we meet on our travels.
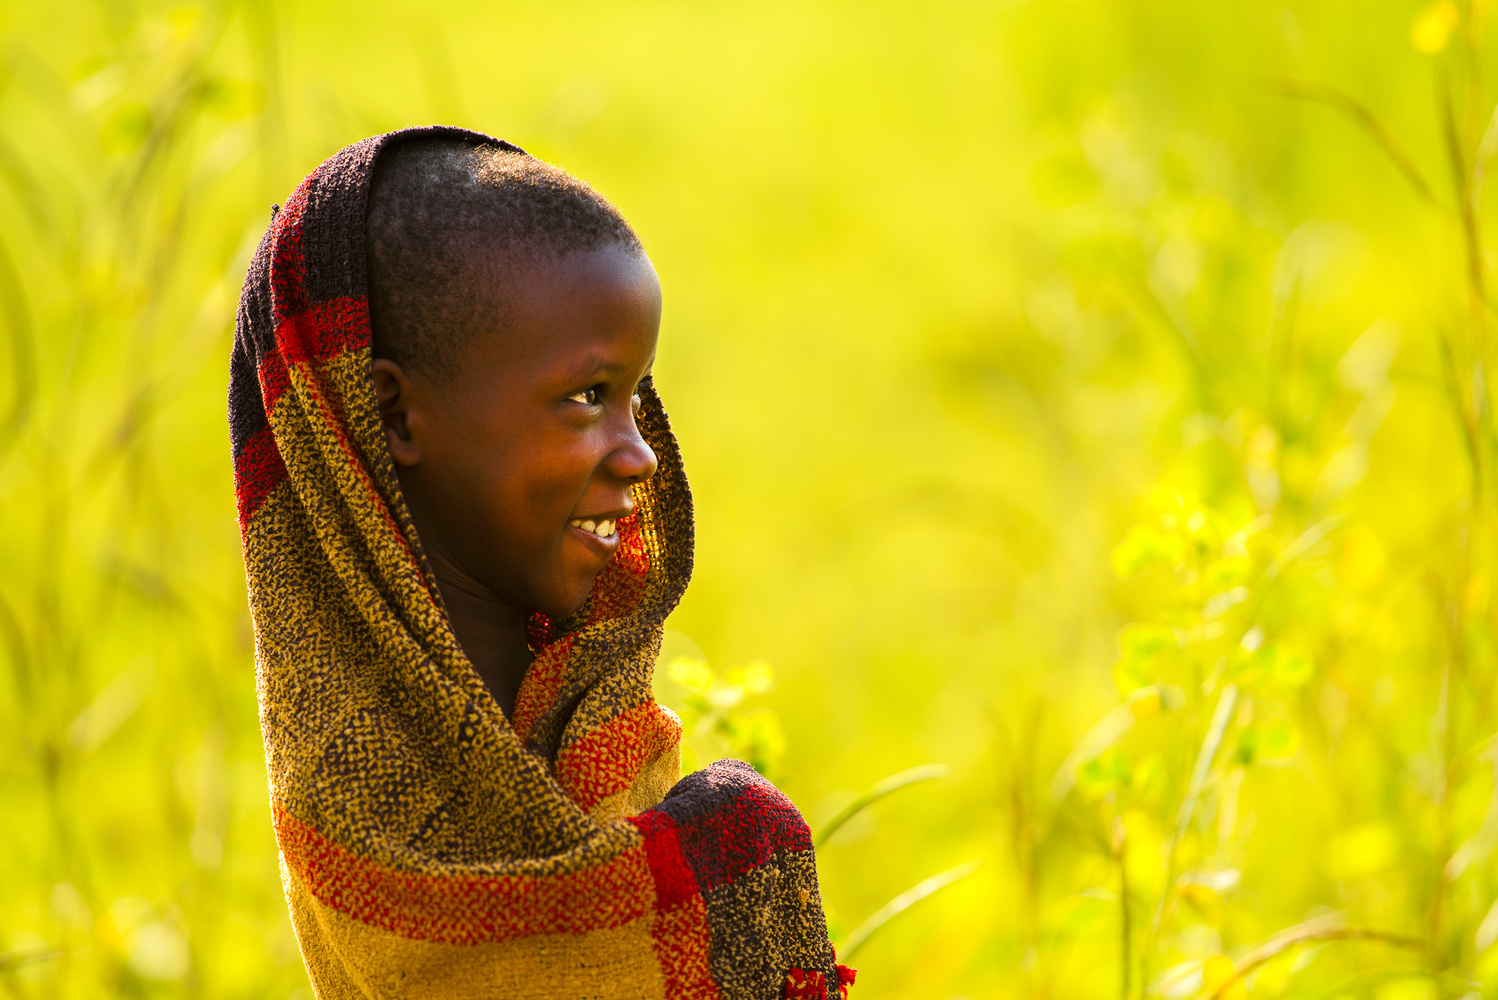
Buganda child. Lugogo Swamp, Uganda.
The Right Gear at the Right Moment
It’s not enough to have the right lens. It has to actually be on the camera when you need it. Two camera bodies now go with us on every trip. It’s incredibly useful from the perspective of having multiple lenses always at the ready. You’ve also got a backup, then, in case a body fails along the way. Further, it means you don’t have to change lenses frequently, which is a doubly good thing in places where it’s frequently dusty or the humidity is high (that is, all the fun places).
We’ve settled over time on two high-resolution, full-frame bodies for the image quality and flexibility they offer, but that’s personal taste. Crop-frame- or micro-four-thirds-based bodies can save a good bit of space and weight, allowing that savings to be spent in other places. Think a bit beforehand, however, about what role each body is supposed to play. We took a full-frame paired with a crop-frame on one trip. The crop frame, we thought, would be ideal for shooting wildlife, but it turned out the autofocus system wasn’t nearly as good as on the full frame. Swapping lenses, though, put the wide angle on the smaller sensor, leaving us with a crop factor that took a huge chunk out of any landscape or contextual shots. Live and learn.
Lastly, don’t forget the tripod. Even if you’re not lugging around a 10-pound lens, magic things can happen when you immerse yourself in the world that will make you glad you’ve got one. When we camped on a remote bend in the Buffalo River one afternoon, we had no idea that an amazing light show would take place later that evening. As fireflies began dancing about the cove, I was able to just plop my camp chair down in a shallow bit of the river and settle in for the show. And because I had a tripod with me, I can share the show with you.

Fireflies wink at one another over a wide bend in the Buffalo river, deep in the Ozark Mountains.
Making Sure Those Great Stories Make It Home
Now that we’ve set ourselves up to get lots of great images, we want to make sure they make it home with us.
Memory Cards
Take a few of them. SD cards are so cheap you can use them as a third backup. Just stash them away for safe keeping when they fill up and insert another card. We usually end up using 128 GB cards rather than something smaller. They’re slightly riskier in the sense that if one fails, we’ll lose more images, but also less likely to get lost while switching them out in a teetering boat or on some jungle trail in the rain.
XQD memory cards, on the other hand, aren’t so cheap. The XQD card gets erased every evening and reused after I’ve verified that I’ve got two hard drive backups of the day’s take. I do have a second backup XQD card stashed away just in case the primary fails since they’re not so easy to come by in the bush. Hope for the best. Plan for the worst.

“I don’t know, it just doesn’t seem to be holding air very well. Can you check it for leaks — just to humor me — and throw a patch on it if you find anything?” Outjo, Namibia.
Batteries
For two camera bodies, we have at least five batteries with two separate chargers. We’ve yet to find ourselves without a fresh battery in the field that way. If you’re headed overseas, make sure the chargers will work at both 50 Hz and 60 Hz, and at both 120 V and 220 V. And don’t forget the appropriate travel adapter and small, multi-outlet power strip. Oh, and be prepared to be creative. The travel adapter we took to Namibia didn’t work in most places. It turns out they use two subtly different plug variations. It took a couple of trips to hardware stores to cobble together a three- or four-layer adapter system that eventually got power from the outlet into a form we could plug a laptop or battery charger into.
Backups

Back up frequently. Let’s just say that places like this don’t suffer fools well. Amazon.
A small laptop with Lightroom (or something similar) installed will give you a way to get files off the camera, manage backups, and do a quick quality check each evening. The small laptop we take only has a 64 GB solid-state drive, so we also carry along two external travel hard drives. One is a little more rugged, with a rubber shell and a rating to withstand a sizable drop. The other has a built-in SD card reader and Wi-Fi access so that in the event the laptop fails, we can still backup our photographs (at least those from a camera using SD cards). Both hard drives run off of USB power so don’t require additional cables. They also allow us to do backups using just the laptop battery when power isn’t available. Each evening, I use Lightroom to import photos from both cameras onto the primary external drive. I then manually copy the images a second time to the other drive. One of the drives usually stays in camp or at the lodge, the other goes everywhere with me in my day pack.
If you’re keeping tally, the number of cables is starting to add up. I’m anal about them when traveling, using a couple of carrying cases to keep them organized. Each case has elastic holders and zippered pouches. Every cable gets stored in the same place each time we repack, that way I know exactly how many elastic holders should have cables in them and how many cables belong in each zippered pouch. It’s easy to tell, then, if something’s missing when I’m packing up, even if it’s 4:30 am in the morning and I haven’t had coffee yet. More than once, it’s been a lifesaver. Forget to repack the laptop power cable three days into a month in the African bush and you’re a bit buggered.
Camera Bag
Of course, now that we’ve got all this crap, we’ve got to have some way to lug it around with us. A good photography-specific backpack can be invaluable. We use the ThinkTank Airport Commuter. It’s got a rugged design with bomb-proof zippers that has stood up to many serious trips around the world at this point. It has room enough to carry all of the above equipment, plus a tripod ball-head, SteriPEN, and a binder with hard copies of all our travel documents.
Note, however, if you’re thinking about getting something bigger than this, stop, and seriously, seriously, think about it first. U.S. airlines are very permissive about the size of items they will allow you to carry on. You can basically strap a small car to your back. Once you get to, for example, Africa, however, they will not typically let you take a standard carry-on size roller bag on the plane. The Airport Commuter is big enough to fit a ton of gear, but will still fit under an airline seat. Any bigger and you may be forced to check it. You do not want that.
Insurance
On that note, just be aware that at least our homeowner’s policy only covers up to $3,000 or so of camera equipment. It’s easy to fit many times that much in even a small camera bag. We have a second, surprisingly cost-effective policy through our insurer that covers all our camera gear anywhere it goes in the world.
Why Bother?

“Last Call” deep in the Ecuadorean Amazon.
Starting to sound like a good bit of kit, eh? Admittedly, I often have no small sense of envy when I see fellow travelers snapping a shot, then slipping a small point-and-shoot back into their shirt pocket. Meanwhile, I’m usually standing there with one camera dangling around my neck and another, a massive DSLR with a long lens, gripped by the tripod mount in my hand.
When we get home, though, and exchange a few photos with folks we’ve met along the way, it’s usually a different story. On a technical level, the little point-and-shoot will always be a bit handicapped when it comes to competing with a full-frame body and massive lens on sharpness, noise, or dynamic range. That’s been borne out time and again in the images we’ve seen from other folks along the road.
Me, I love a technically well-executed image, that finely honed blend of art and science. But whether that’s important to you — whether a little less noise or sharper details will help you tell the story you want to tell — that’s a totally different question! The important thing is to see the world, to have fun doing it, and to share your enthusiasm for it with others in whatever way makes the most sense for you.
Genuinely hope to see you out there! And let me know in the comments what lessons you’ve learned traveling over the years!